This guide will show you how to create an exit intent popup with CommerceGurus Popups.
The popup will be assigned to the product pages of a WooCommerce store. When a user is about to exit the store, the popup will be displayed or triggered.
If you haven’t installed the CommerceGurus Popups plugin, please do this step first.
If you’d like to create an on scroll popup, view the Getting Started with Popups – Creating an On Scroll Popup documentation.
How to Create an Exit Intent Popup
This guide will show you how to create a popup that’s triggered when a visitor is about to exit your store.
The popup will be shown on desktops and laptops when the user’s cursor leaves the browser window and is positioned over the URL bar, signaling their intent to leave your store.
The popup can also be set to open on mobile devices when a user scrolls back up a page by a certain amount.
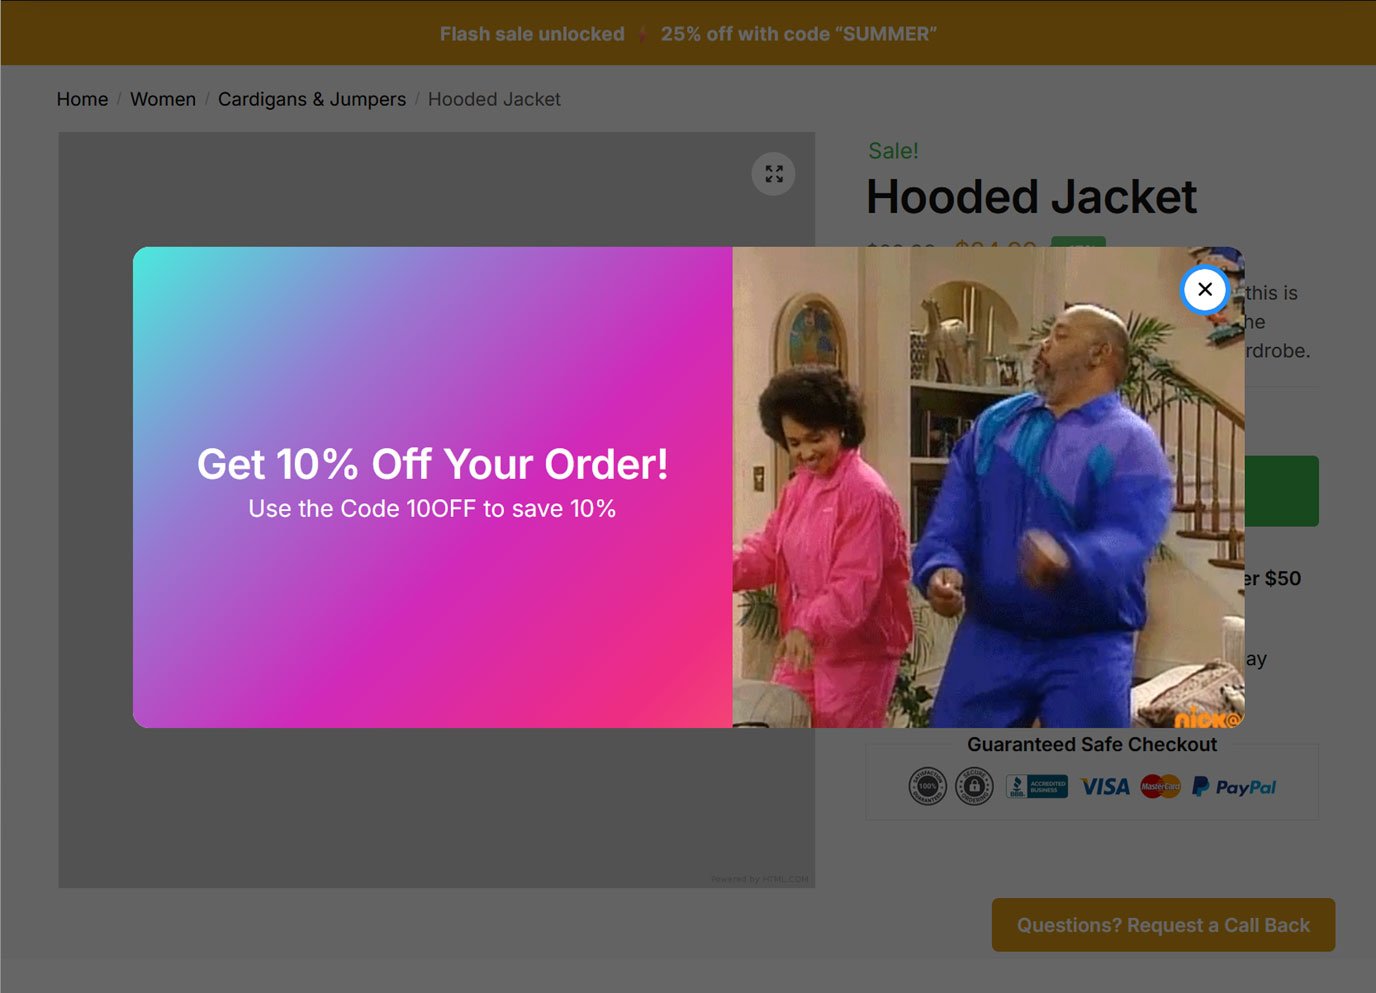
The popup created in this guide will be set to only display on product pages. This makes the popup a good option for displaying content that will resonate with users who are at this stage in their buying journey.
For example, creating a popup containing a money-off coupon code that’s displayed when the user is about to exit the store could be used to persuade them to stay at the store and make an order.
Creating the Popup
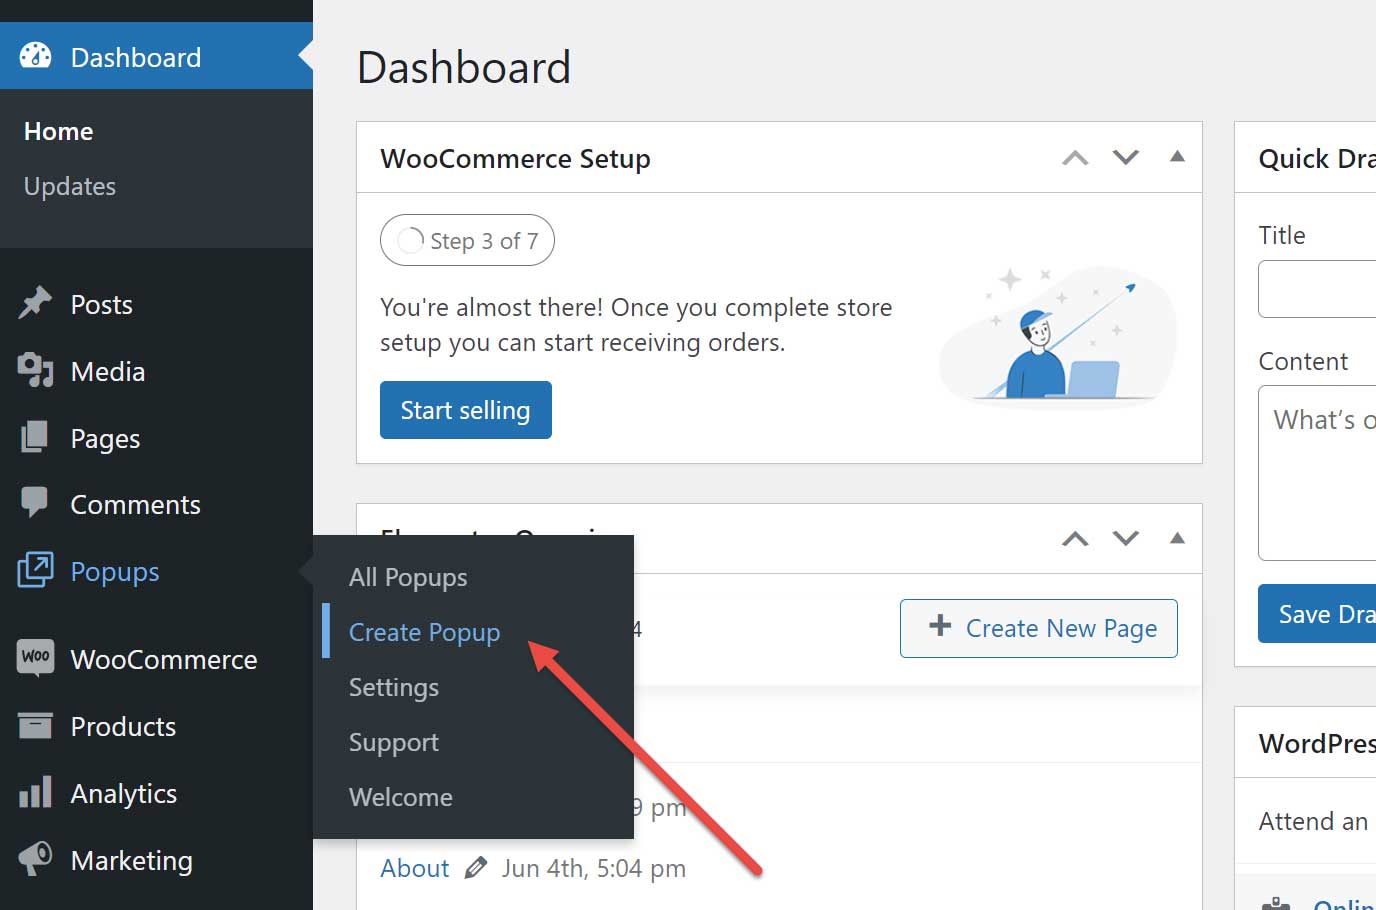
To create an exit intent popup for your WordPress site, log in to the WordPress admin area.
From the WordPress admin sidebar menu, click Popups → Create Popup.
Configuring the Popup Trigger
The popup builder will now be displayed. From there, you can give your popup a title, such as “Exit Intent Popup.”
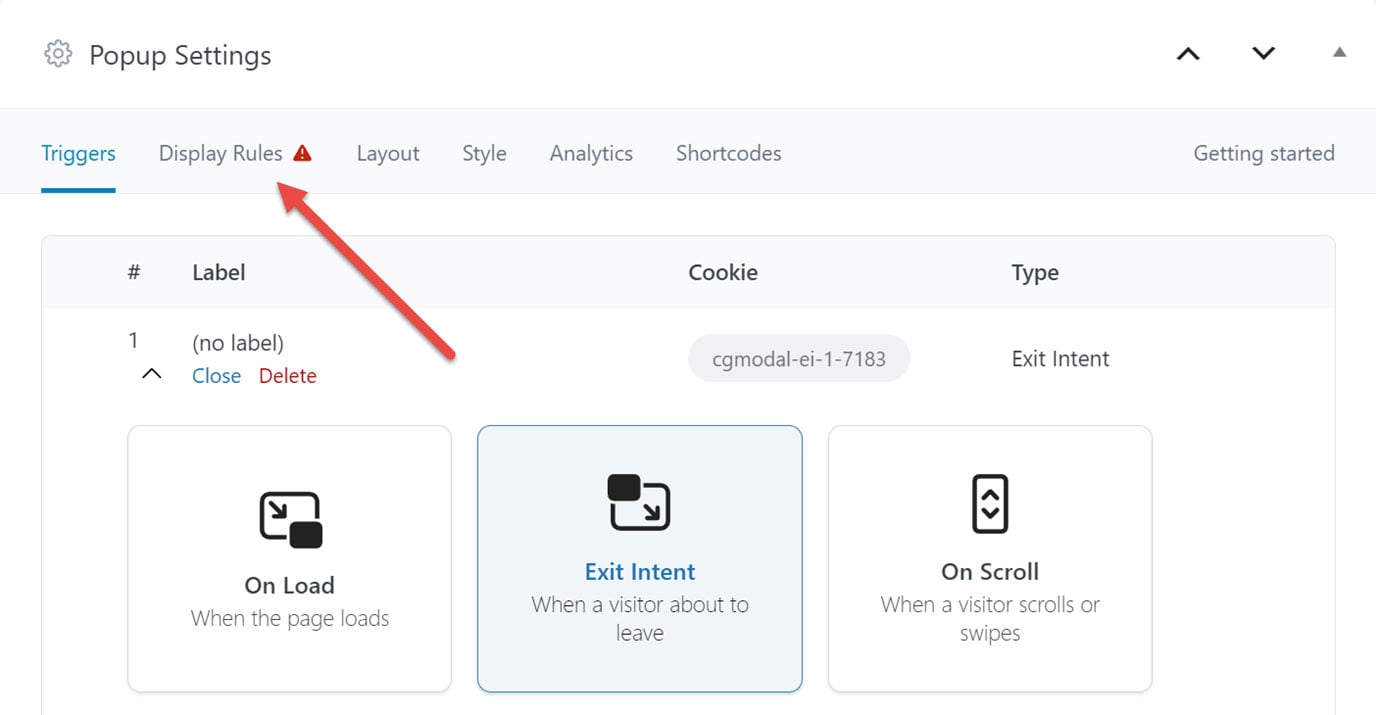
Then, click on the Add Trigger button in the Popup Settings panel.

Click on the Exit Intent option from the available triggers.
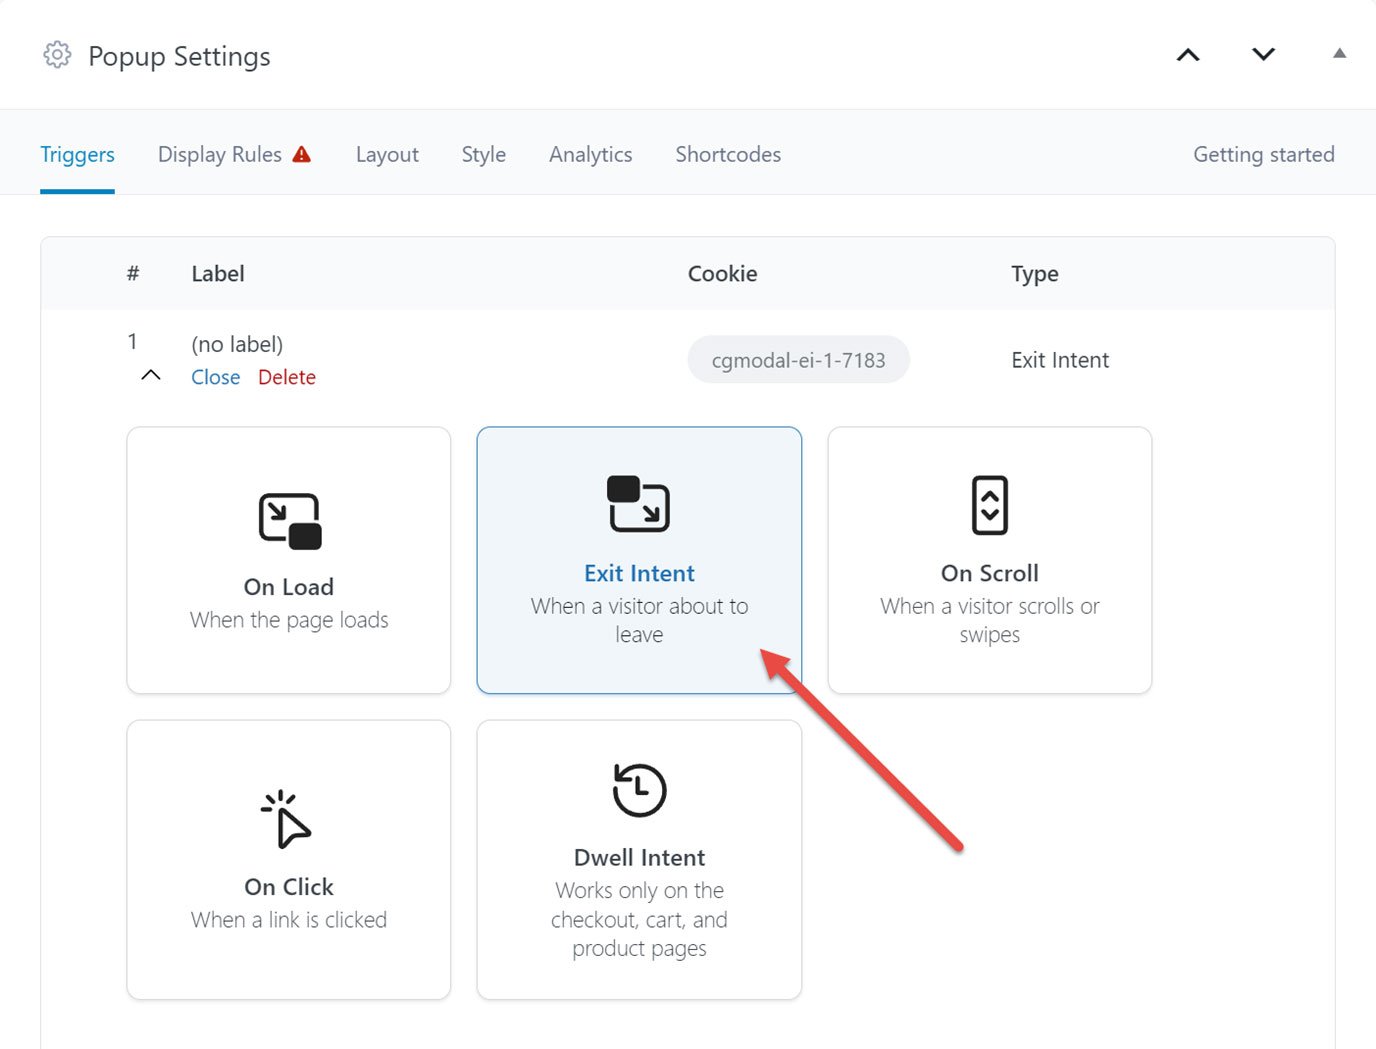
Controls for the trigger will now be displayed below the buttons.
From there, you can configure how the exit intent trigger will work for this popup.
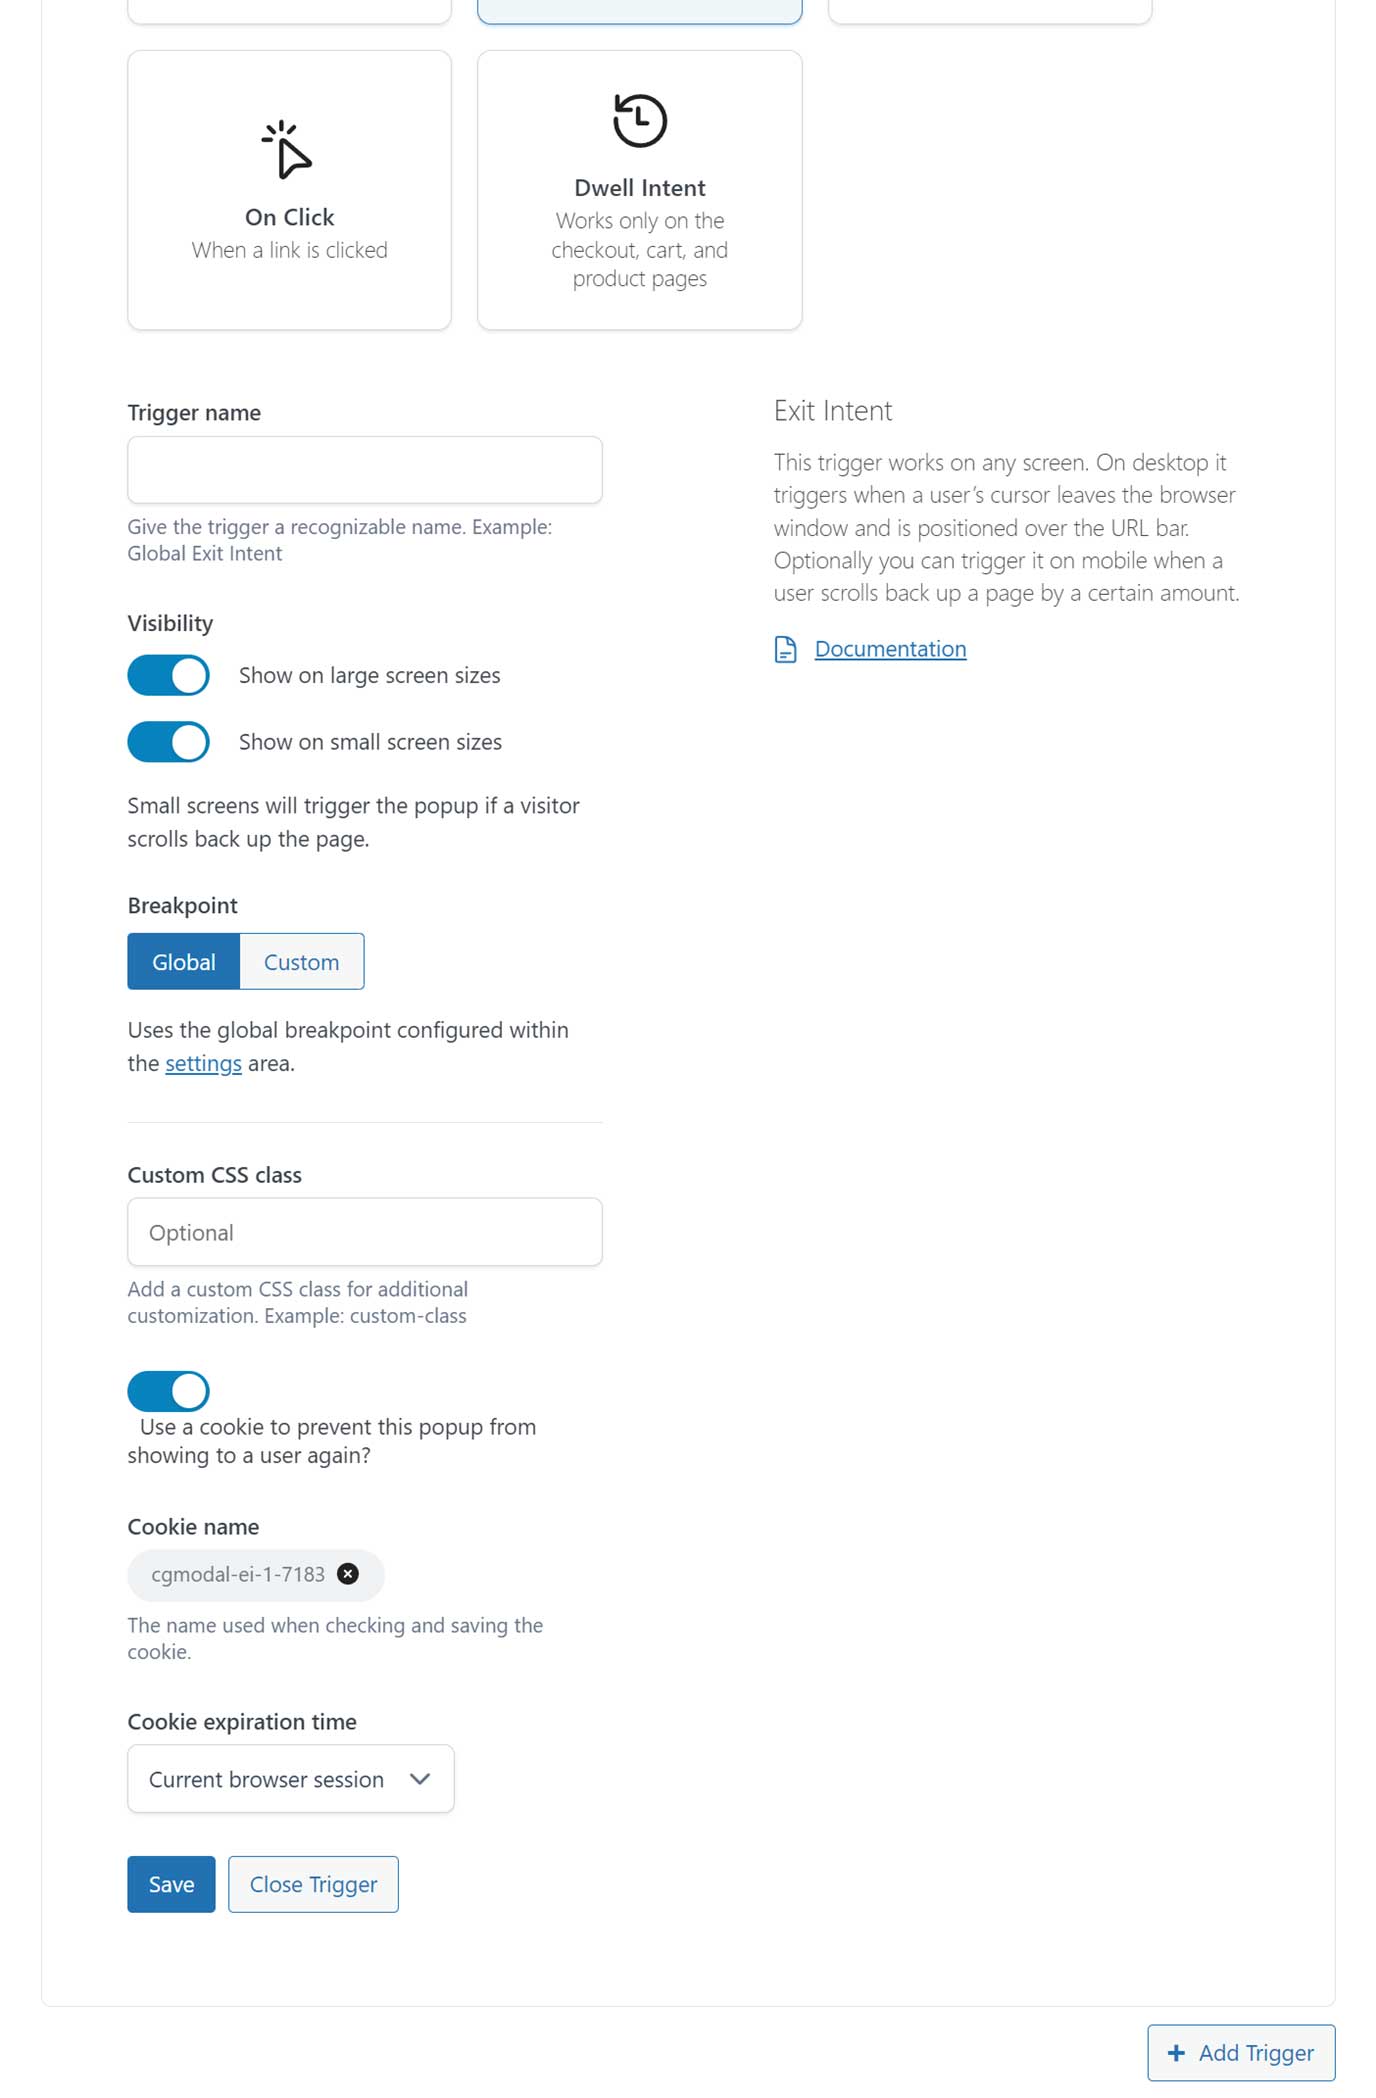
By default, the popup will be triggered on large and small screen sizes, which typically means desktop and laptop devices as well as mobiles. However, you can adjust this under the Visibility section.
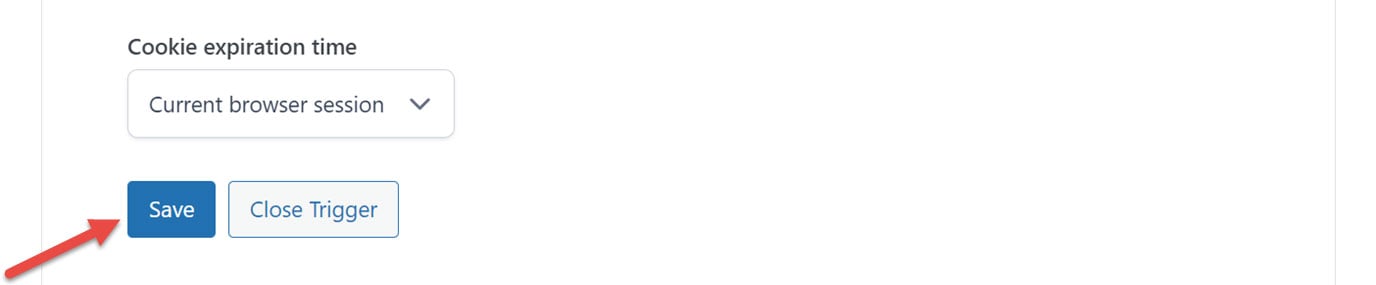
You can also use a cookie to prevent showing this popup to the same user more than once. This setting is enabled by default, and if you keep it enabled, you can set the cookie expiration time. This allows you to show the popup to the same user more than once but control how much time must pass before it is shown to them again.
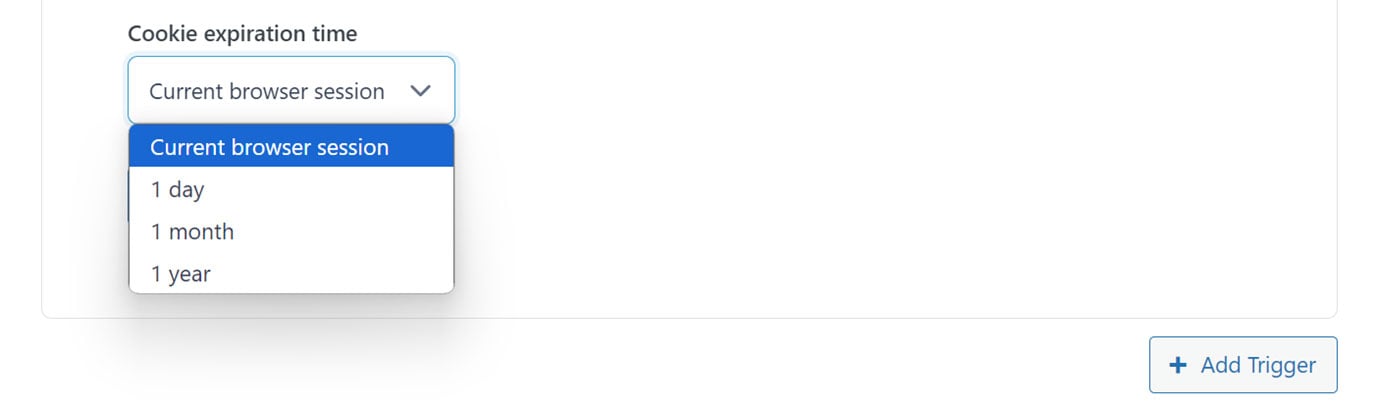
One option is to choose a cookie expiration time of one month. This will enable you to show the popup content to the same user multiple times but not more often than once a month to avoid overwhelming them.
Once you’ve configured the trigger for this popup, click the Save button.
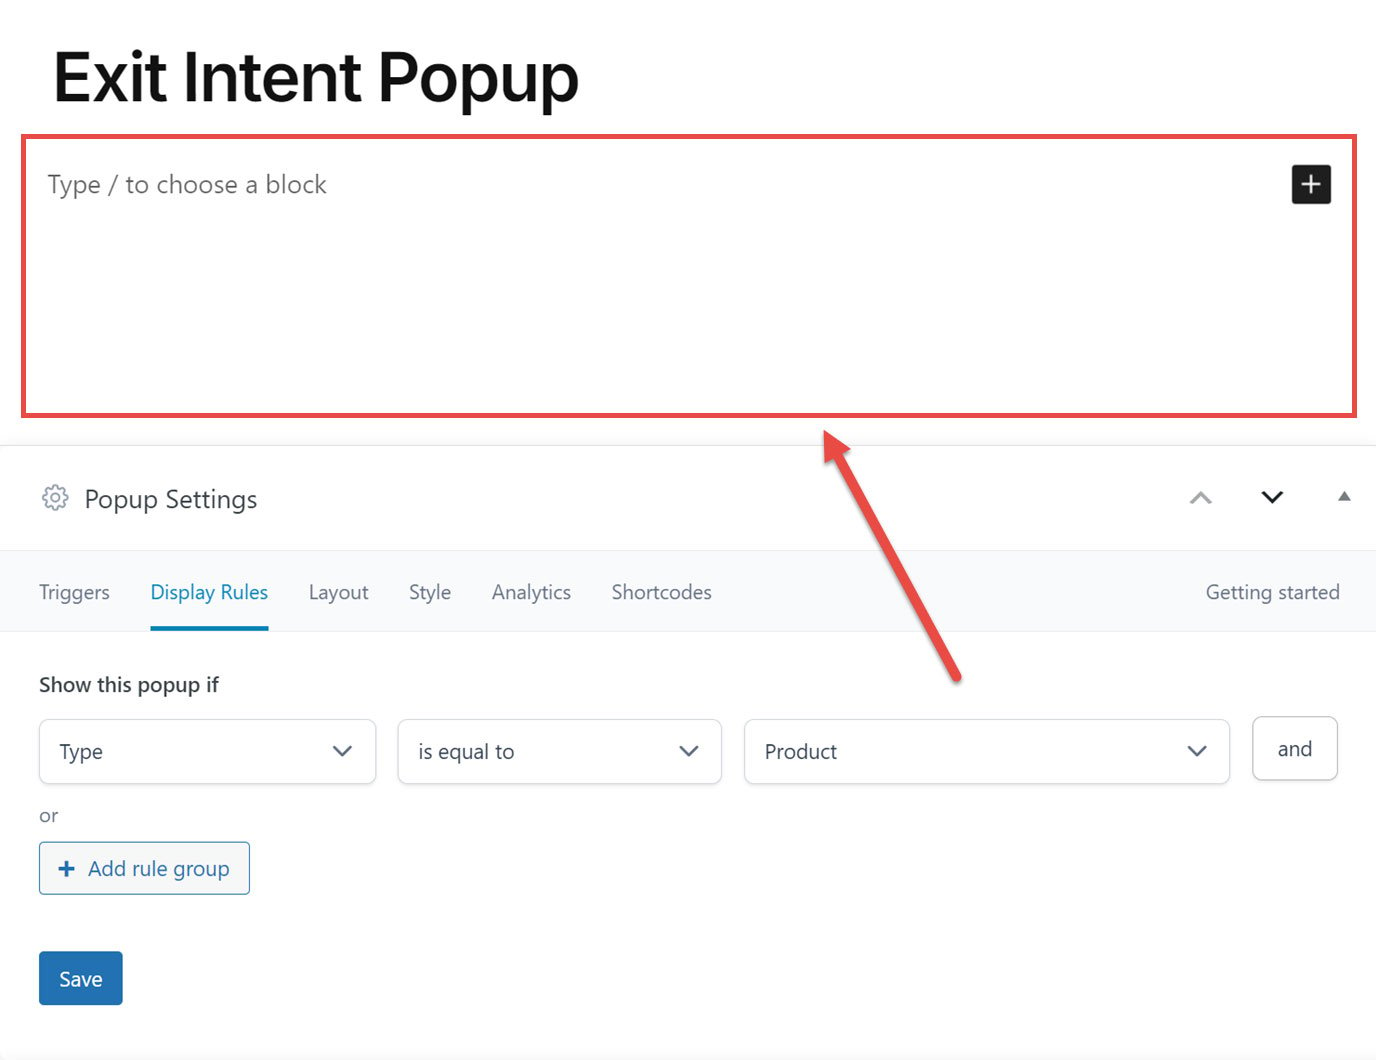
Configuring the Popup Display Rules
Now, it’s time to configure the display rules for the popup. This will define where the popup is displayed on your site.
For this guide, we’re creating a popup that’s displayed on the product pages of your store.
So, with that in mind, click on the Display Rules tab at the top of the Popup Settings panel.
As we only want to display this popup on the product pages of our store, click on the first drop-down menu field and select Type.
Then select is equal to from the second drop-down menu field and select Product from the second drop-down menu field.
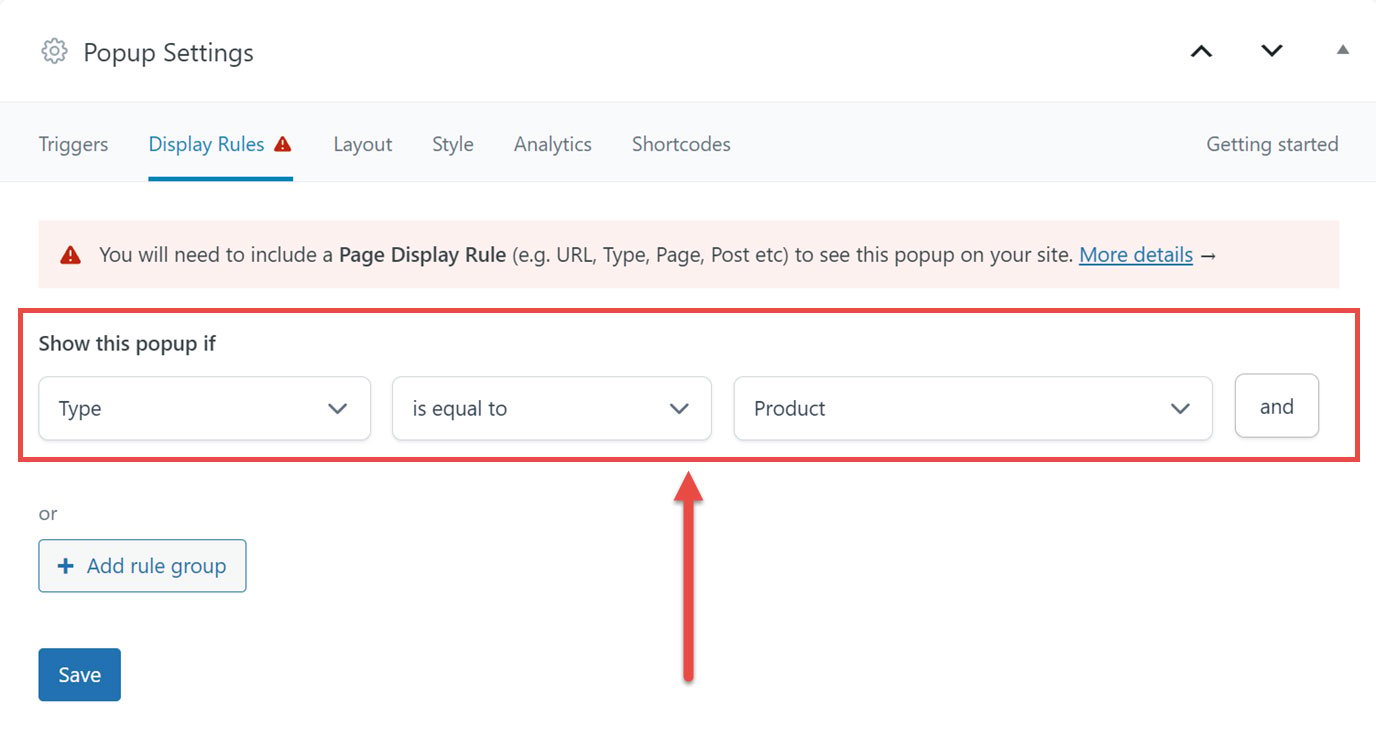
CommerceGurus Popups has many other display rules as well as the ability to combine display rules to create more advanced conditions. See the display rules documentation for more information.
Click the Save button to confirm the configuration.
Set the Layout of the Popup
Now, it’s time to set the size and position of the popup from the Layout tab.
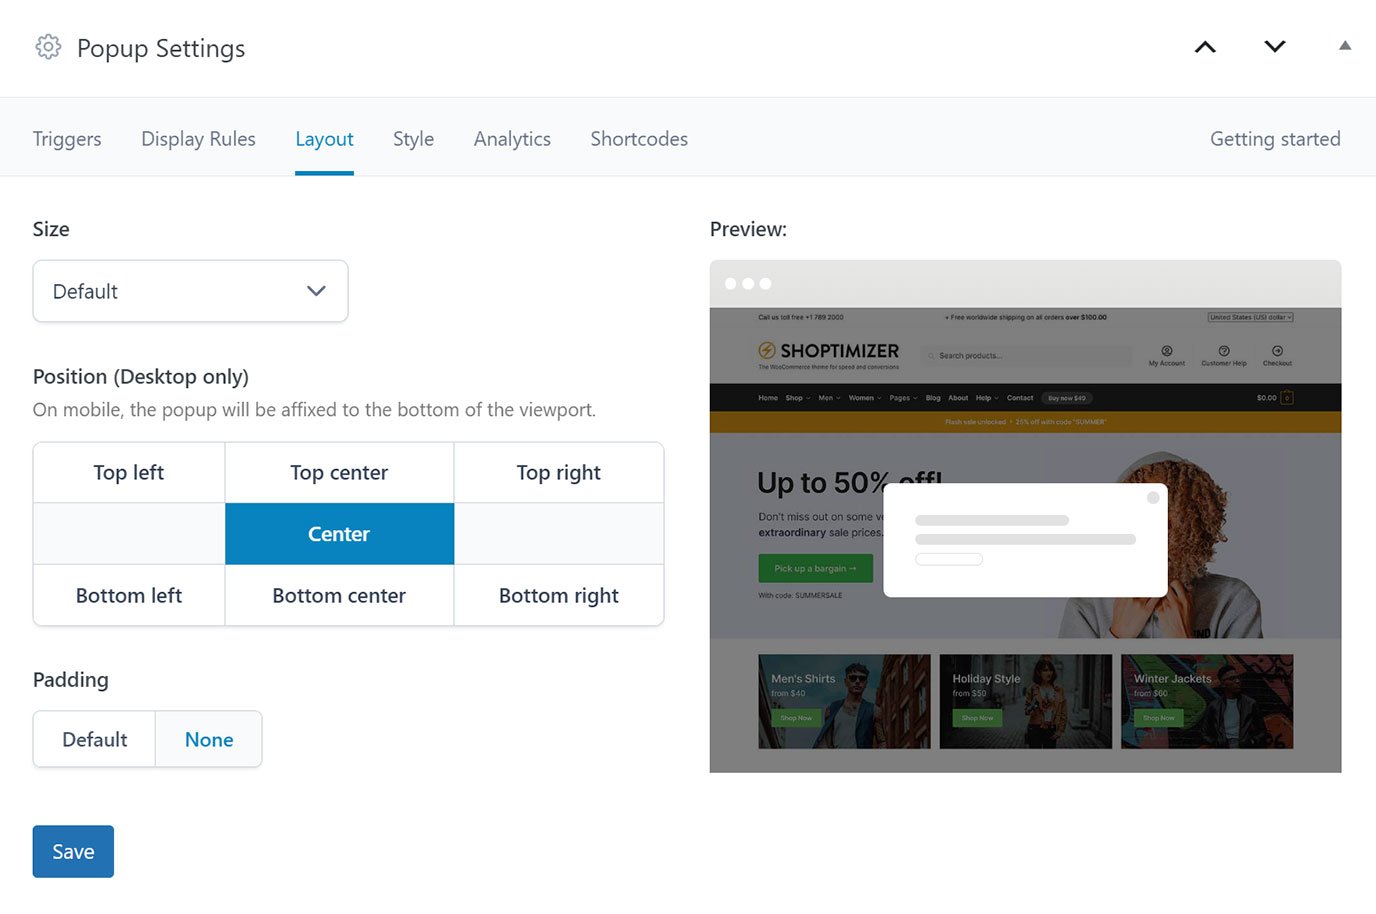
The default settings will display a medium-sized popup in the center of the screen.
As with any of the popup settings, you can change the layout settings after the popup has been published. Therefore, if you’re unsure of which size, position, and padding settings to choose, stick with the default for now.
Click the Save button to confirm the layout settings.
Styling the Popup
The Style tab contains settings that control the colors of various popup elements, such as the background color and the overlay behind the popup.
The popup design documentation page has more information about what these settings are related to.
If you make changes, click the Save button to apply them to your popup.
Designing the Popup Content
Now that we have created a popup that will be triggered when a user is exiting the store but only when they’re viewing a product page, it’s time to create the popup content itself.
There are two main ways to create the popup content. One is to use the default WordPress editor, and the other is to use a page builder plugin, such as Elementor or Beaver Builder.
For this guide, we’ll use the default WordPress editor, but you can also learn about enabling a page builder for use with CommerceGurus Popups.
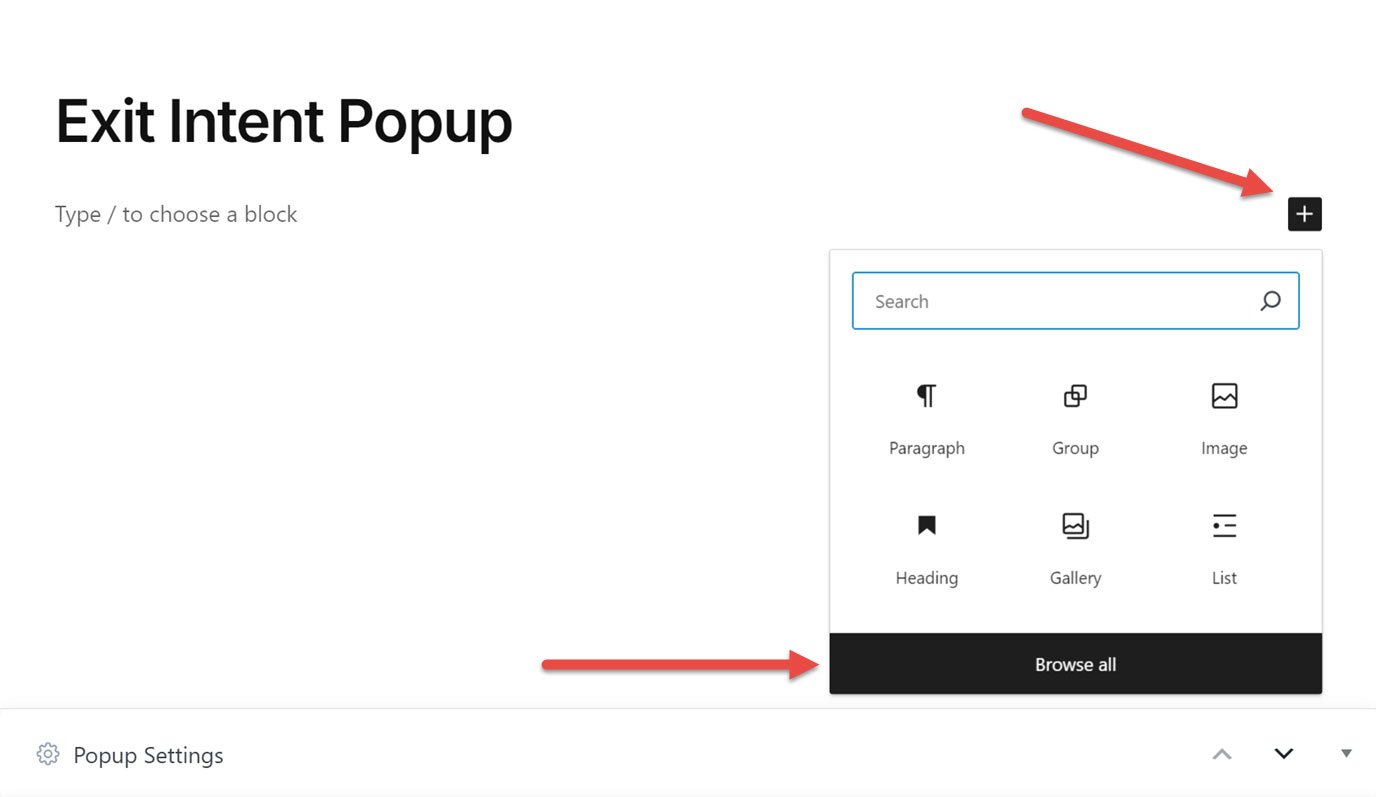
You can add content to the popup in the top part of the popup builder interface.
A quick way to build your popup is to use patterns. These ready-made layouts can be inserted into your popup via the editor and customized.
To add a pattern to your popup, click on the + icon, then the Browse all button.
Then click on Patterns from the left side panel. This will display all the pattern categories available on your site.
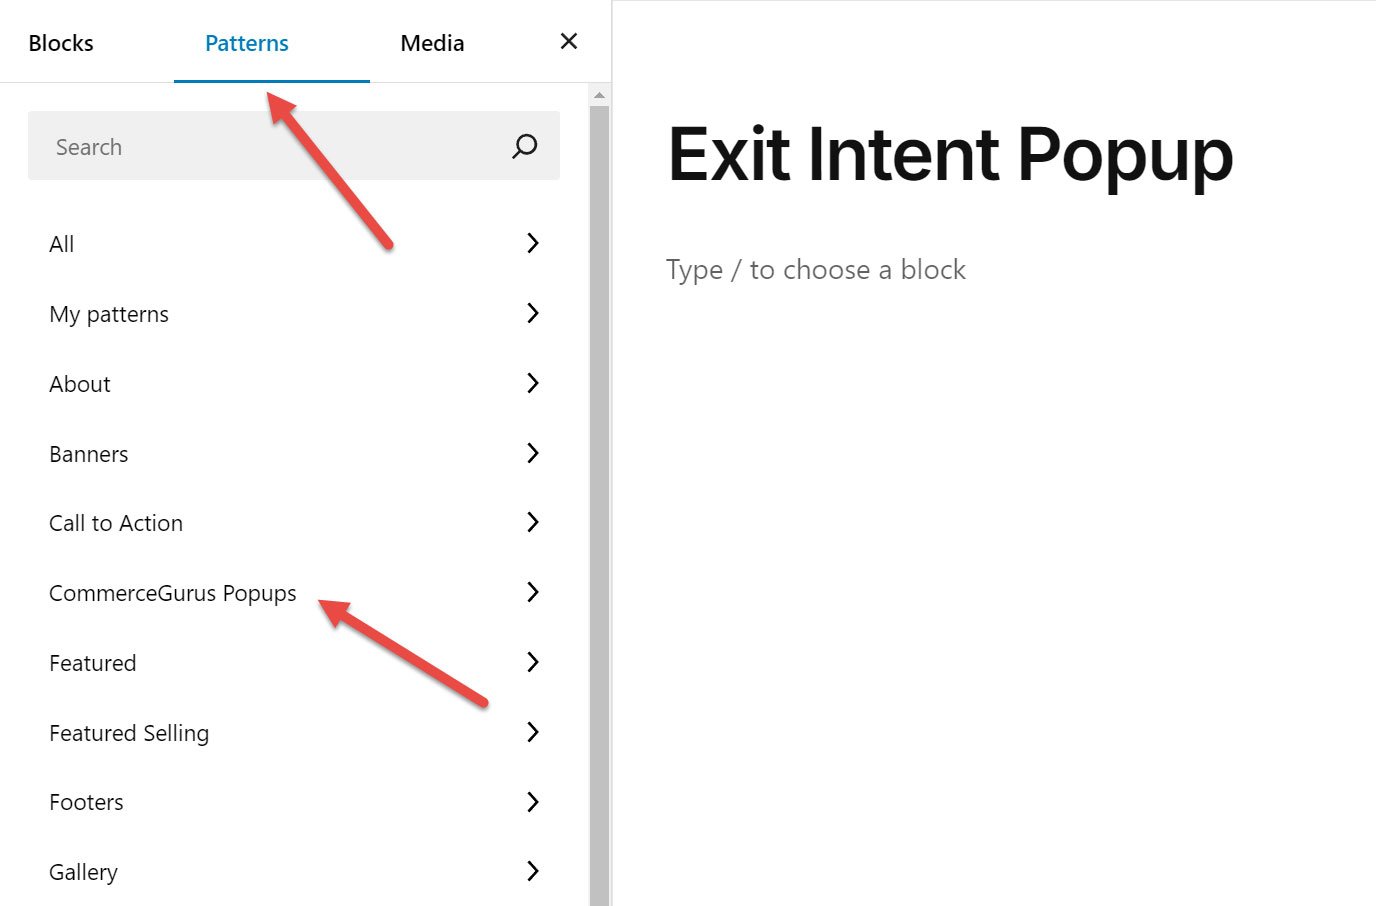
You can add any patterns from your site to your popup. However, the CommerceGurus Popups plugin includes a selection of patterns built specifically for popups.
If you click on CommerceGurus Popups from the left side panel, you can see the patterns that came with the plugin.
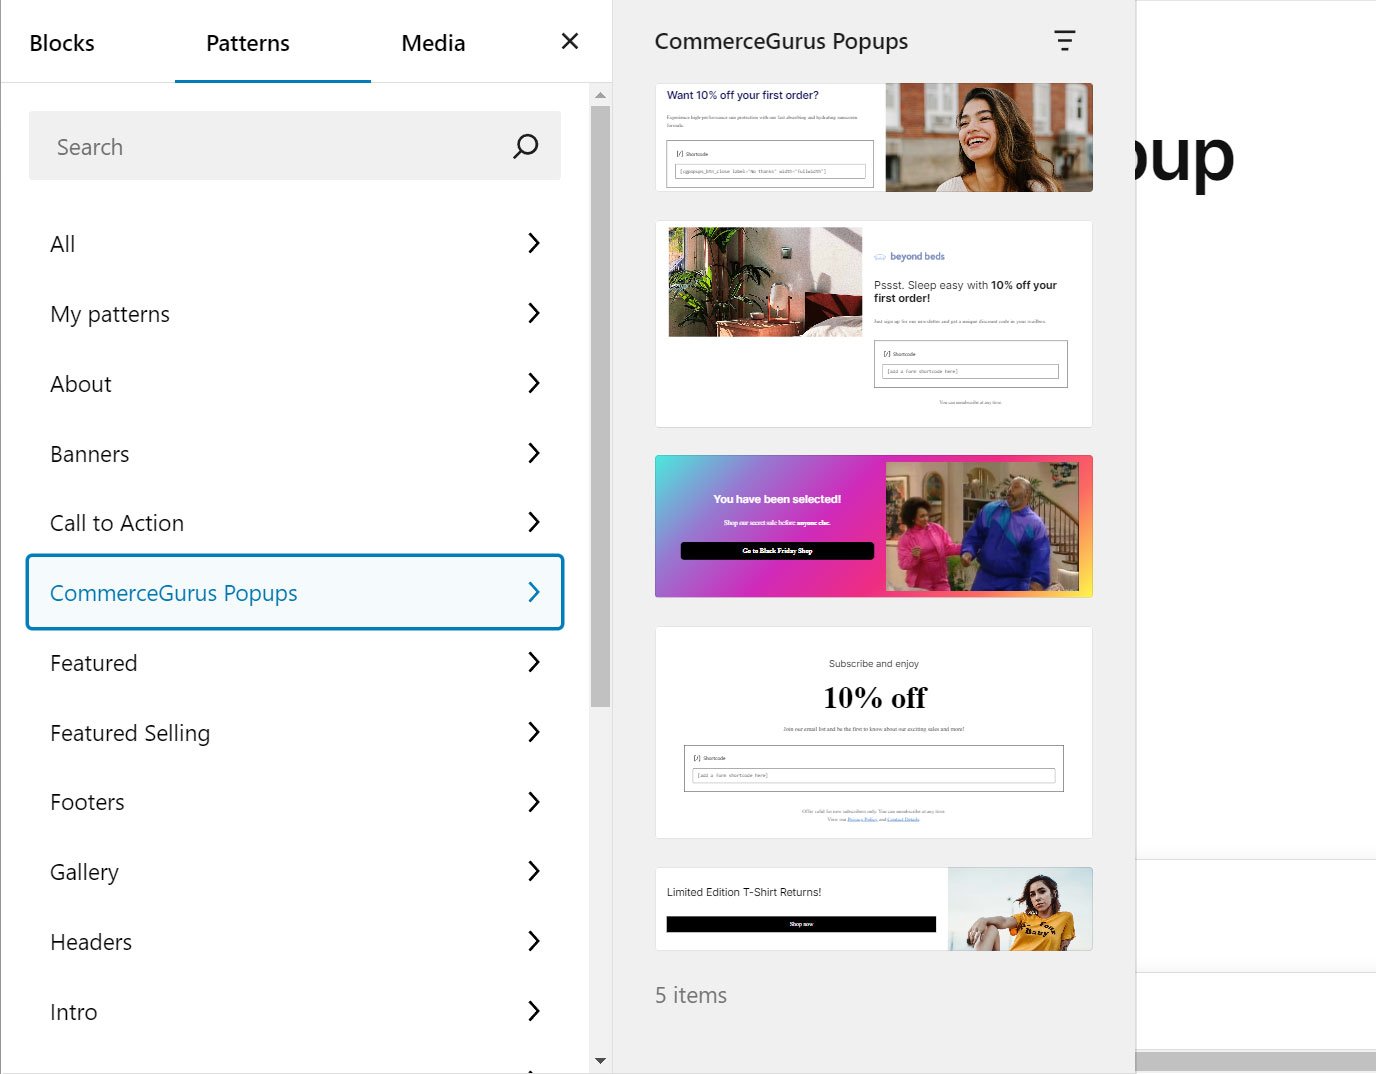
Clicking on a pattern adds it to your popup. You can add multiple patterns or blocks to your popup.
As this popup will be displayed when a user is viewing a product and is also about to leave your store, you might want to display a discount coupon code in the popup to encourage them to stay at the store and purchase the product they were looking at.
To create this type of popup, add a pattern to your popup, then add the details of a coupon you’ve created in WooCommerce.
For inspiration for your popup design, check out our guide to eCommerce design best practices.

You can also learn how to create a coupon for your store by reviewing WooCommerce’s documentation on the topic.
Once you’re happy with the design and settings, you can click the Publish button at the top of the screen to activate the popup.

To test if the popup is working as intended, visit a product page on your store and move your cursor to the URL bar. The popup should then be activated.
If you don’t see the popup, go back through the previous steps to check you’ve configured the popup to work in this way.
The popup can be configured to use cookies to prevent it from being shown to the same user too frequently (via the Trigger tab settings). Therefore, you might not be able to see the popup again in the same browser until the cookie has expired.
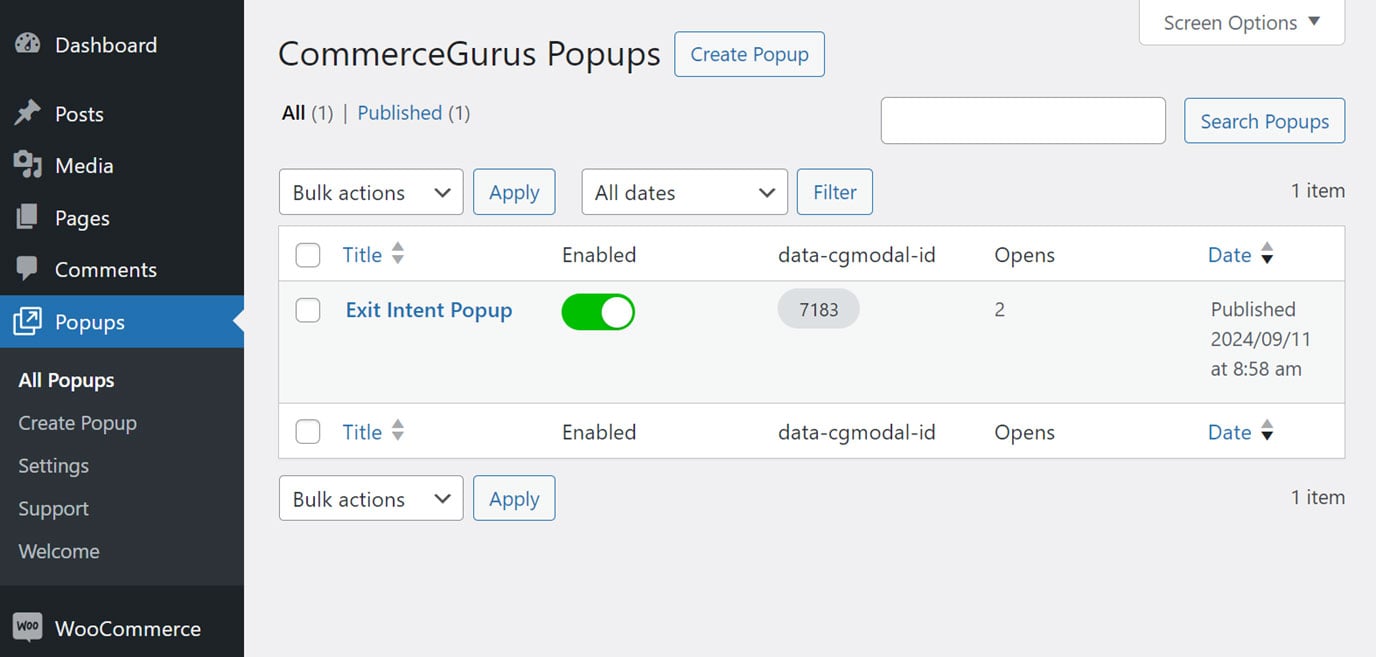
The popup will now be available to manage and edit from the All Popups area of your WordPress admin.
To create other types of popups with CommerceGurus Popups, check out these guides: