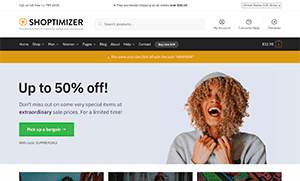
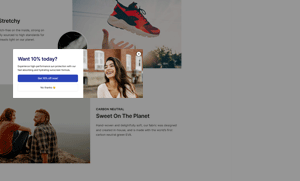
CommerceGurus comes with five different types of interactions, which when performed by the user, triggers the popup to appear. Let’s look at each one.

On Load
The most straightforward. This will display the popup after the certain amount of seconds has passed. You can adjust the delay time in seconds.
So if you enter 5 seconds, the popup will appear 5 seconds after a user loads the page, regardless of whether they’ve starting scrolling or performed any actions.
As this trigger is intended to be quite obtrusive, you would need to decide if this pattern is suitable for what you are promoting.
Exit Intent
This is a popular action to attempt to recover cart abandonments and to try and keep visitors on your site. On desktop it triggers when a user’s cursor leaves the browser window and is positioned over the URL bar. Optionally you can trigger it on smaller devices when a user scrolls back up a page by a certain amount.
Offering a coupon code or some kind of offer to keep a potential customer engaged would be a typical use case for this trigger.
In the Shoptimizer example above you can see an exit intent popup appear when my cursor leaves the pages and moves towards the address bar.
On Scroll
The On Scroll trigger is a bit less obtrusive compared to On Load. It will only trigger once a user has scrolled by a certain percentage (between 0-100) down a page.
This may be a useful trigger to incorporate on longer content pages, such as blog posts. A trigger which collects newsletter subscriptions from readers who have come to the end of an article could be a great way to build a mailing list, as you are targeting engaged and interested users.
Note that if you want it to appear once a user has scrolled to the very end of a page, it may be better including a little bit of slack in case they didn’t reach the very bottom of the browser window, e.g. 95%.
On Click
The On Click trigger will show a popup once a link or a button has been clicked. It should be used in conjunction with the Everywhere option within the Display Rules tab.
When you select On Click, you will be given three different options for the link. The best, and most accessible option is to use the suggested button markup.
The result would look something like this – but the data-trigger ID will change depending on your setup.
|
1 |
<button data-trigger="cgmodal-oc-1-29179">Open</button> |
You can paste this markup into a particular page’s content area. Or you could add it to a site widget which displays the output in your header or footer on every page.
You can also add a separate class to the button markup in order to style it with custom CSS:
|
1 |
<button data-trigger="cgmodal-oc-1-29179" class="custom-button">Open</button> |
Note that you can combine this with another trigger, say for example, “On Scroll”. If a customer dismisses the on scroll popup too quickly and regrets not availing of an offer contained within, they would still be able to re-activate the popup via the On Click link.
In the True Classic example above, I closed a discount popup too quickly (this happens a lot) – but I was glad to see a fixed On Click button on the bottom left of the page which allowed me to interact with it again.
Dwell Intent
You can find out more about this unique trigger in the separate Dwell Intent article.


