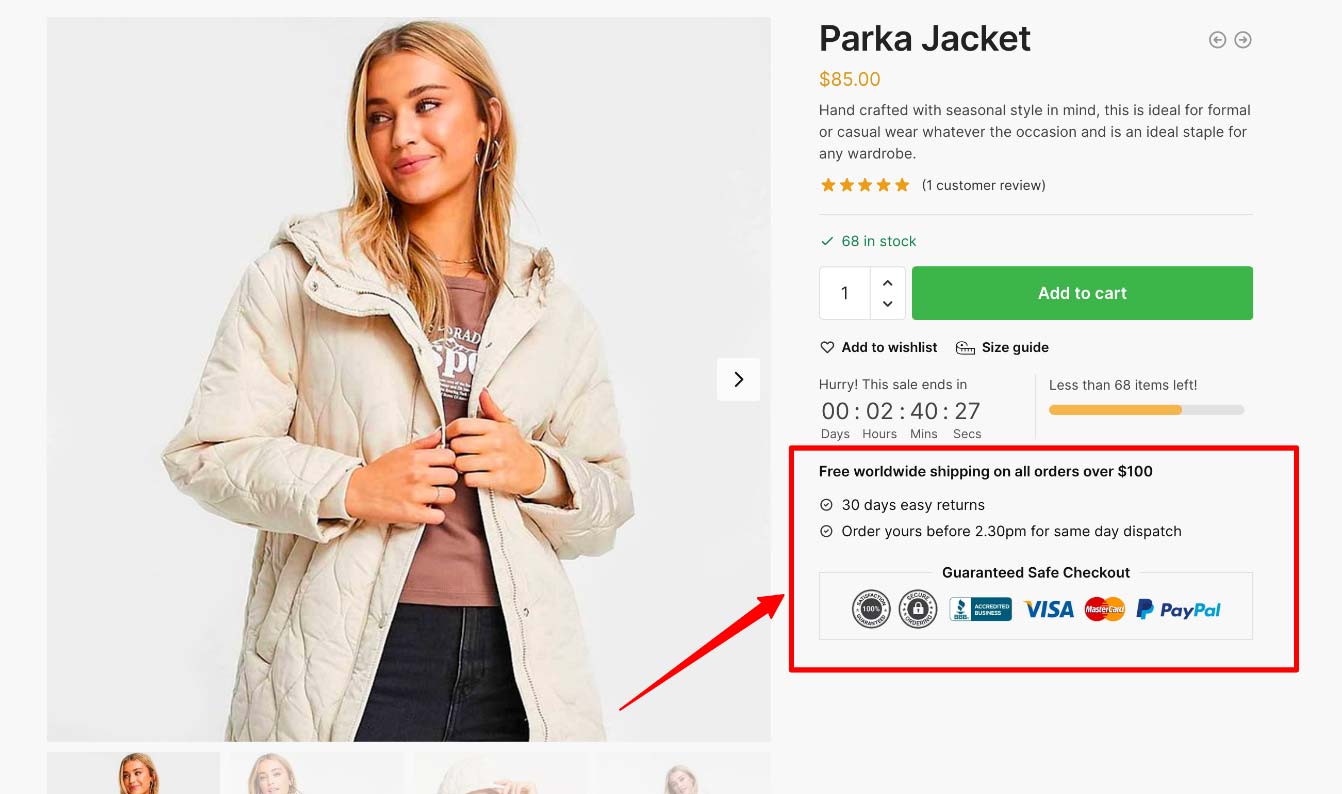
Trust badges are used throughout the theme and are normally included within the demo data. If you did not add the demo data, and want to include these manually, this is how you do it.
Update: December 2022.
The trust badges provided in the demo data have been updated to use new DIY badges. The previous demo image included screenshots of seals from third parties including TRUSTe and Google Trusted Store.These were included for demonstration purposes only and were not intended to be used on live stores. If you wish to use trust badges from a third party vendor it’s important to understand you first have to purchase them from the relevant vendor.
All demo data within Shoptimizer is purely placeholder content to demonstrate how we recommend you set up your eCommerce store for optimal conversion optimization, intended to be replaced with your own preferred content.
There has been some very interesting research conducted by Baymard on the different types of trust symbols and their impact on conversion which should help inform which trust badges are right for your store.
Go to Appearance > Widgets And look for the following widget areas.
Single Product Custom Area

Go to: Appearance > Widgets > Single Product Custom Area.
For the Single Product Custom Area widget, add a standard Text widget to this space. Switch to the ‘Text’ tab within it and paste the following.
|
1 2 3 4 5 6 |
<strong>Free worldwide shipping on all orders over $50</strong> <ul> <li>30 days easy returns</li> <li>Order yours before 2.30pm for same day dispatch</li> </ul> <fieldset><legend>Guaranteed Safe Checkout</legend><img class="alignnone size-large wp-image-1191" src="[path to your image]" alt="" width="1024" height="108" /></fieldset> |
You can switch back to the Visual Tab after.
Cart Custom Area
Go to: Appearance > Widgets > Cart Custom Area.
Again, add a Text widget. Switch to the Text tab, and add the following.
|
1 |
<img class="alignnone size-large wp-image-1192" src="[path to your image]" alt="" width="1024" height="108" /> |
Checkout Custom Area
Go to: Appearance > Widgets > Checkout Custom Area.
Same process as the others.
|
1 2 3 |
<img class="alignnone size-large wp-image-1192" src="[path to your image]" alt="" width="1024" height="108" /> <h4>What they are saying</h4> <img class="alignleft wp-image-829 size-thumbnail" style="width: 60px; border-radius: 50%; margin-right: 1.5em;" src="https://via.placeholder.com/150.png" alt="Sean Walsh" width="150" height="150" />The quality of the customer service and speed of delivery was just fantastic - I know I can count on Shoptimizer every time! |
You would need to save this sample image (right-click and select Save as) and upload it to your own WordPress Media Library. Then, update the [path to your image] to reference your own url.


